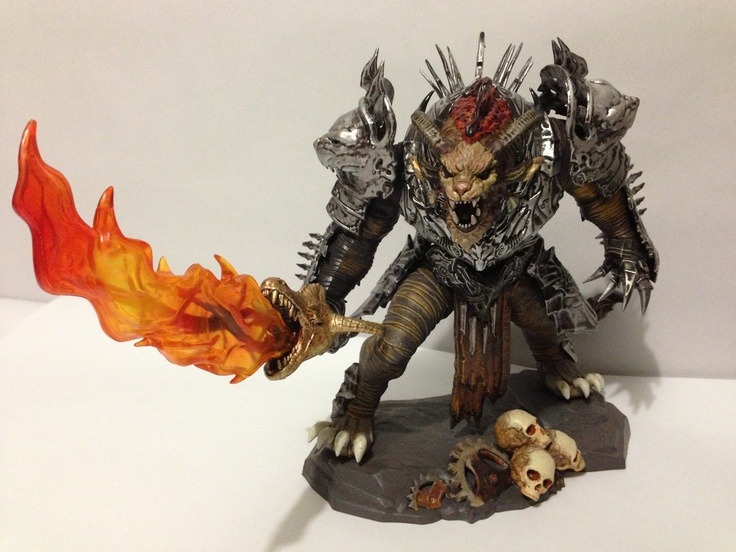
Creating a Guild Wars figurine that stands out and reflects your character’s uniqueness involves a step-by-step process that combines planning, attention to detail, and creativity. This guide will help you craft a figurine that can become a true representation of your in-game character, potentially even surpassing it in style and coolness.
1. Planning
The first step in creating a Guild Wars figurine is planning. Start by choosing the character you want to replicate. Consider what makes your character unique. Is it their armor, their weapon, or perhaps a specific stance they take? Write down every detail, no matter how small, to ensure your figurine will be as accurate as possible.
Next, gather reference materials. Use screenshots from the game to capture different angles of your character. These images will be invaluable as you begin the crafting process. Consider printing these images or keeping them open on a device for easy access.
2. Gathering Materials and Tools
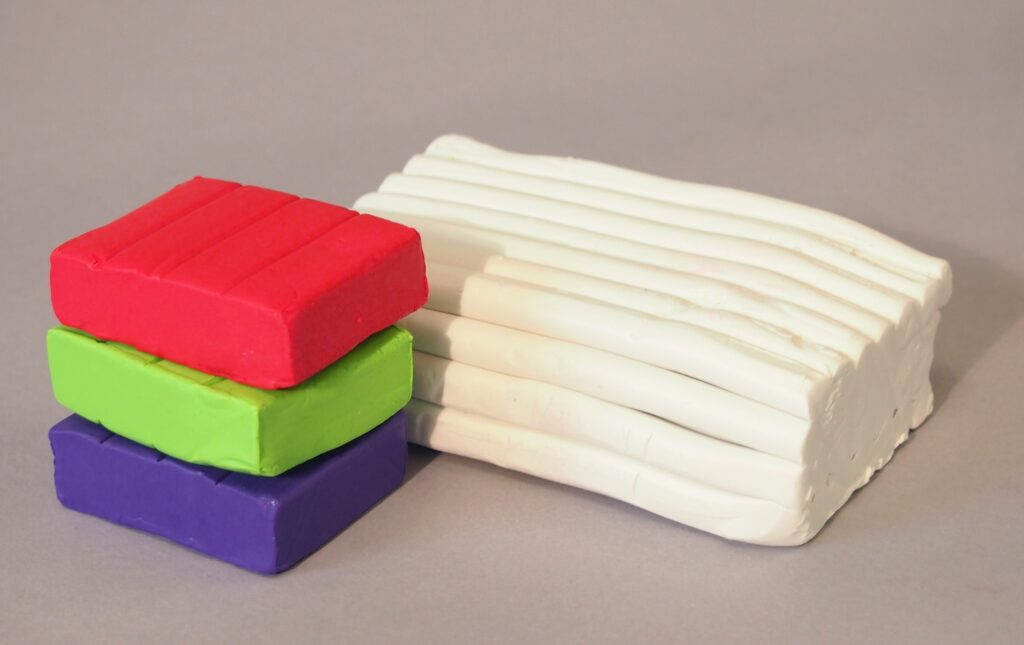
Once you have your plan in place, gather the necessary materials. For most Guild Wars figurines, you’ll need the following:
- Modeling clay or plastic: This will form the base of your figurine.
- Sculpting tools: A variety of tools will help you shape the clay or plastic into your character’s likeness.
- Paint: Choose colors that match your character’s in-game appearance.
- Brushes: Fine brushes are essential for detailed painting work.
- Superglue: For attaching different parts together securely.
- Varnish: To give your figurine a polished, finished look.
Choosing high-quality materials will ensure your figurine is durable and detailed. Don’t compromise on the quality, as this will impact the final product.
3. Sculpting
Begin by sculpting the base of your Guild Wars figurine. Start with the general shape of the body, and gradually add details. Focus on getting the proportions right before moving on to finer details like armor, weapons, and facial features.
If you’re new to sculpting, consider practicing on a separate piece of clay or plastic before working on the actual figurine. This can help you get a feel for the tools and materials.
As you sculpt, constantly refer to the screenshots you took earlier. This will help you capture the essence of your in-game character and ensure your figurine is as accurate as possible.
4. Adding Details
Details make a significant difference in the overall look of your Guild Wars figurine. Pay special attention to elements like armor, weapons, and facial features. Use your sculpting tools to carve out these details with precision.
Don’t rush this step. Taking your time will result in a more polished and impressive figurine. Remember, the goal is to create a Guild Wars figurine that’s even cooler than your in-game character, so every detail counts.
5. Painting
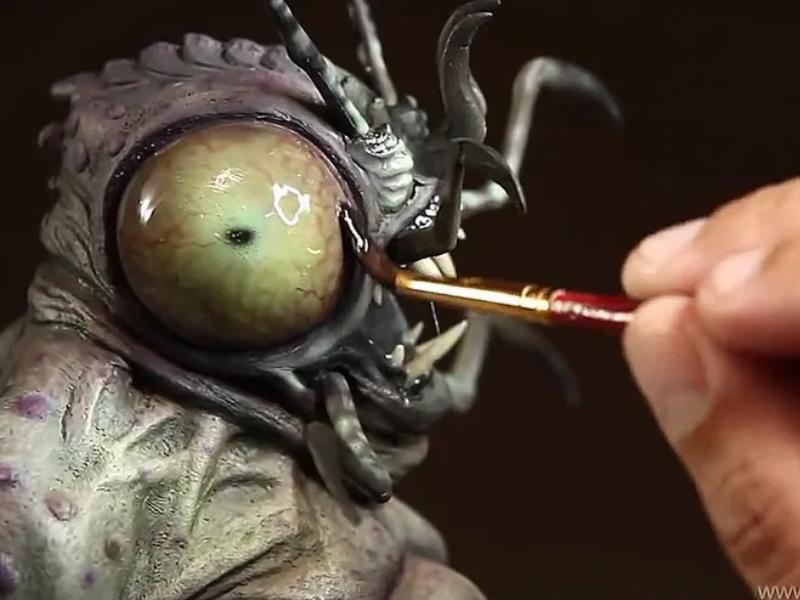
Once you’ve finished sculpting, it’s time to paint your Guild Wars figurine. Start with a base coat that matches the primary color of your character. Then, gradually add layers of paint to build up the colors and details.
Use fine brushes for small details, like facial features or intricate patterns on armor. Patience is key here. Allow each layer of paint to dry before applying the next to avoid smudging or mixing colors unintentionally.
Consider using shading techniques to add depth to your figurine. This can make your Guild Wars figurine look more realistic and dynamic, giving it that extra edge over your in-game character.
6. Assembling
After painting, you may need to assemble different parts of your Guild Wars figurine, such as attaching the head to the body or connecting weapons. Use superglue to attach these parts securely. Hold each piece in place until the glue sets to avoid any misalignment.
Ensure all parts are firmly attached and that there are no visible gaps or loose sections. This step is crucial for the durability and overall appearance of your figurine.
7. Finishing Touches
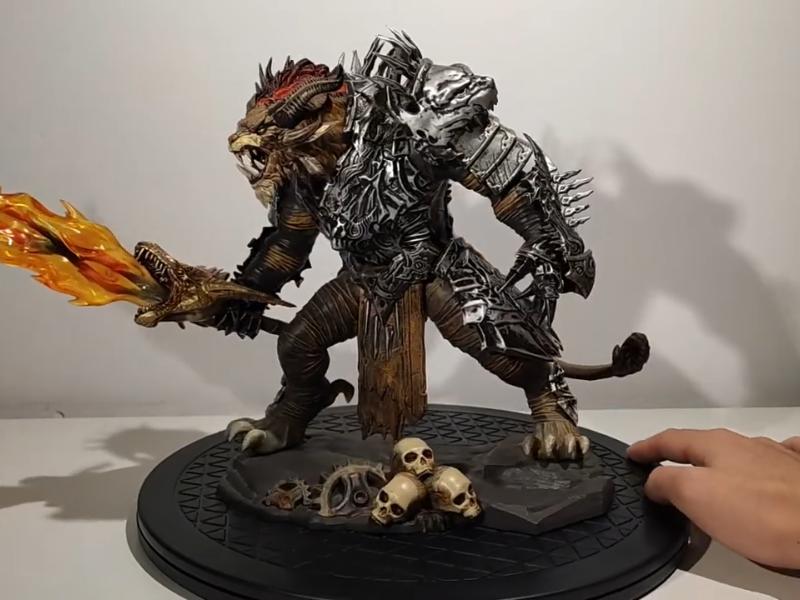
The final step in creating your Guild Wars figurine is applying varnish. This not only gives your figurine a polished look but also protects the paint from chipping or fading over time. Choose a varnish that suits the finish you want, whether it’s matte, satin, or glossy.
Once the varnish is applied and dried, take a moment to review your work. Compare your Guild Wars figurine to the reference images and make any final adjustments. This could involve adding tiny details or touching up the paint in specific areas.
8. Displaying
Now that your Guild Wars figurine is complete, it’s time to find the perfect spot to display it. Choose a place where it can be admired, whether it’s on a shelf, in a display case, or on your desk. Proper lighting can also enhance the look of your figurine, so consider placing it under a spotlight or near a light source.
9. Sharing Your Creation
Consider taking high-quality photos of your figurine from different angles and sharing them online. Whether it’s on social media, forums, or dedicated Guild Wars communities, sharing your creation can inspire others and give you a sense of pride in your work.
You could also participate in contests or exhibitions where fan-made creations are showcased. This can be a great way to meet fellow Guild Wars enthusiasts and gain recognition for your hard work.
10. Tips for Improvement
- Experiment with different materials: Try working with resin, metal, or other materials to see how they affect the look and feel of your figurines.
- Learn new techniques: Sculpting and painting are skills that can always be improved. Look for tutorials, workshops, or classes to enhance your abilities.
- Challenge yourself: Try creating figurines of other characters or even custom designs that aren’t in the game. This can push your creative boundaries and help you develop your style.
Conclusion
Creating a Guild Wars figurine that’s cooler than your in-game character is a rewarding project that combines creativity and craftsmanship. By following the steps outlined in this guide, you can craft a model that not only reflects your character’s uniqueness but also stands out as a work of art.